
Remember that charming Norfolk Island Pine that decked the halls last December? Don’t toss it in the compost bin just yet! These tropical beauties can easily transition from festive centerpiece to year-round houseplant with a little TLC and a Smart Pot.
From Tropical Giant to Indoor Gem
Norfolk Island Pines (Araucaria heterophylla), native to the South Pacific, tower over 200 feet in their natural habitat! Thankfully, indoors they max out at a manageable 6-9 feet, making them ideal low-maintenance houseplants. And what better way to nurture their gentle growth than with the breathable magic of Smart Pots?
Smart Pot Perks for Your Pine
- Hydration Heaven: Norfolk Pines prefer slightly moist soil, making Smart Pots the perfect container selection! They prevent waterlogging while promoting air circulation, suring happy, healthy roots.
- No More Root Circling: Say goodbye to root circling, a common problem with traditional pots. Smart Pot’s Geotextile Fabric gently air-prunes roots, encouraging strong and vibrant growth
Transplanting Norfolk Island Pine into Smart Pots
Trim | Prep
Start by removing and dead or discolored branches from the lower portion of the plant. Your Norfolk will thank you for the fresh start!
Potting Up + Soil Rejuvenation
Choose a Smart Pot with ample room for growth – we selected the Milk Crate Liner for its size and convenience. Fill your Smart Pot halfway with a soil revitalizer. We recommend Pennington Soil’s Rejuvenate Potting Soil Mix, which revitalizes your existing soil with essential nutrients like Canadian Sphagnum peat moss and composted bark with earthworm castings and added biostimulants. By utilizing the plant’s original media and revitalizing, you are greatly reducing the shock experienced by the plant from transplanting.
The Pennington Rejuvenate Premium All-Purpose Potting Soil Mix will also feed your Norfolk Island Pine up until next Holiday season!
Nestle and Fill
Gently remove your Norfolk from its original container and place it in the center of the Smart Pot. Check for a nice, upright posture and fill the gaps with more Rejuvenate mix. Leave 2-3 inches at the top to avoid spillover during watering.
Watering Your Norfolk Island Pine
Give your pine a good soak! Your Smart Pot will take care of excess water, ensuring perfectly hydrated roots. Keep in mind that Norfolk Island pines love humidity, so misting their foliage every day or two will keep them green and smiling. For future waterings, once the top of the soil feels dry, water your Norfolk to ensure it does not dry out; they like being moist but not drenched.
Location
Find your Norfolk a bright spot near an east or south-facing window They thrive in average indoor temperatures (60-70°F) and enjoy plenty of light. Norfolk will tolerate some shade but sunshine fuels their growth.
BONUS
For taller Norfolks, consider staking them for a little extra support and to maintain their graceful silhouette.
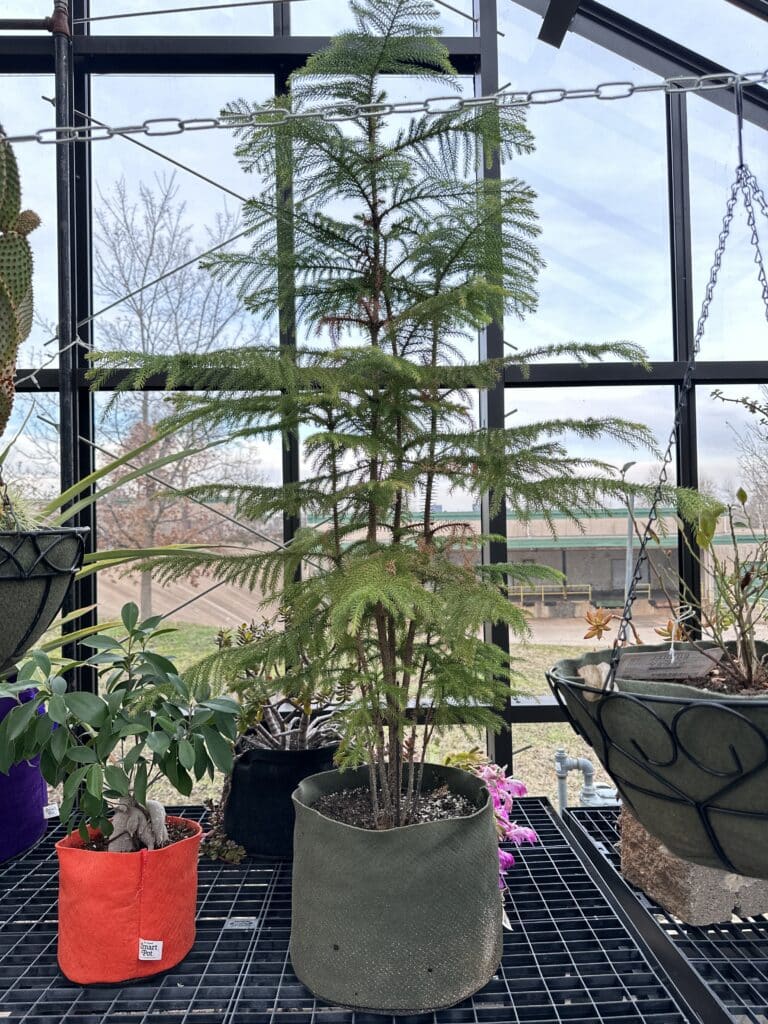
Check out the Norfolk Island Pine growing in the Smart Greenhouse – it’s been in its 5-Gallon Smart Pot for two years now and is reaching for the sky at almost 5 feet tall! Grab a Smart Pot today and let the green adventure begin!
With these simple steps and the technology of Smart Pot, you’ll give your Norfolk Island Pine a second life, transforming it from a temporary holiday guest into a permanent resident of your indoor Smart Pot Garden. Watch it grow, flourish, and bring a touch of island magic to your home every day of the year!


